What Happens During an Aircond Chemical Wash? Step-by-Step Guide
Is your air conditioner running but failing to cool the room, or worse, releasing a musty smell? You might need more than a standard filter change. In the HVAC industry, we call this a “chemical wash” or a “deep clean.” It is the most effective way to restore a unit that has lost efficiency due to deep-seated grime.
According to the U.S. Department of Energy, a dirty AC system can degrade efficiency by up to 15%, significantly increasing your monthly utility bills. This guide walks you through the professional deep cleaning process for a ductless mini-split system so you know exactly what to expect from a service visit.
Before We Start
Initial Assessment
A professional technician does not simply start spraying water. They begin with a diagnostic check to ensure the issue is dirt-related and not a mechanical failure.
- Airflow Check: Technicians use an anemometer to measure the current wind speed from the blower.
- Temperature Differential: We measure the “Delta T” (the difference between air intake and output temperatures) to establish a baseline.
- Error Codes: We scan the unit for any existing fault codes.
Preparation
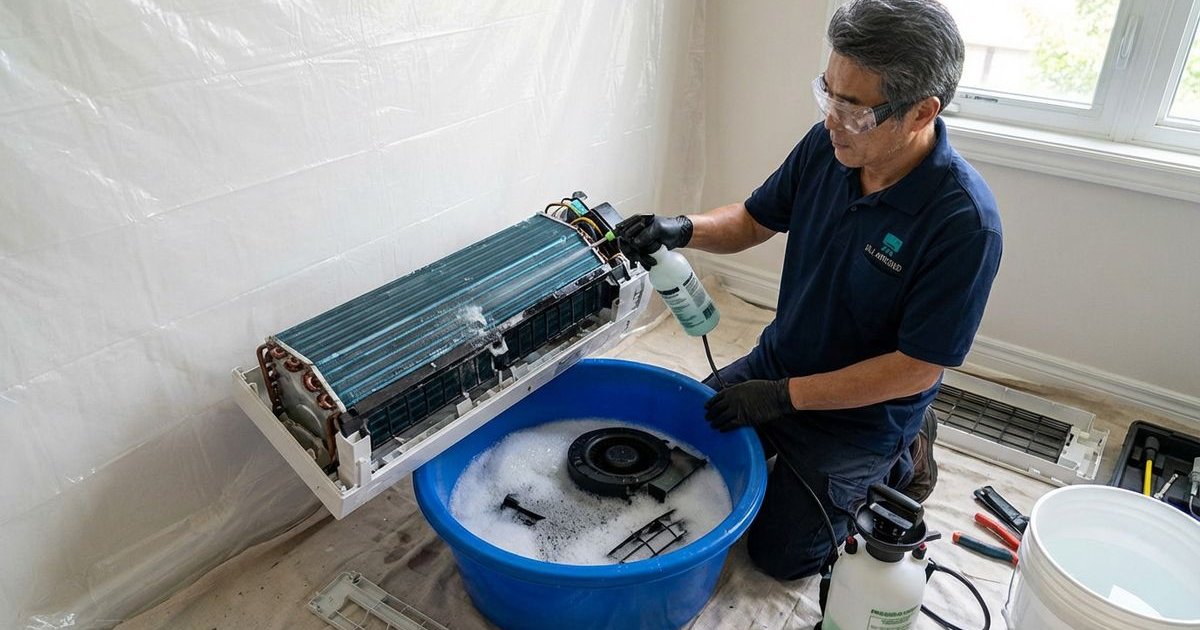
Protecting your home is just as important as cleaning the unit. We set up a specialized catchment system, often referred to by pros as a “bib kit” (like the SpeedClean Mini-Split Bib). This funnel-shaped bag attaches tightly to the unit to catch every drop of water and chemical runoff.
- Drop Cloths: We lay waterproof tarps on the floor to protect carpets and hardwood.
- Furniture Protection: Any nearby electronics or valuables are moved or covered.
Step 1: Power Isolation (5 minutes)
Safety is the absolute priority. Before touching any internal components, we perform a strict lockout procedure.
- Disconnect: We unplug the unit or pull the disconnect switch at the outdoor condenser.
- Circuit Breaker: We flip the specific breaker in your electrical panel to the “Off” position.
- Verification: Using a non-contact voltage tester, we confirm the unit is completely de-energized.
This step is critical to comply with safety standards and prevents any risk of electrical shock during the wet cleaning phase.
Step 2: Front Panel Removal (5 minutes)
Accessing the internal components requires removing the cosmetic shell.
- Filters: We remove the mesh dust filters (these are often clogged).
- Casing: We unscrew and unclip the plastic front fascia.
- Louvers: The directional blades that steer airflow are carefully detached.
This exposes the evaporator coils (the metal fins) and the blower wheel, which are the main targets for cleaning.
Step 3: Full Dismantling (10-15 minutes)
A true chemical wash goes deeper than a standard service. We disassemble key internal parts to reach hidden mold and dust.
- Blower Wheel (Fan Roller): This cylinder spins to push air. It often harbors thick mold that standard sprays miss. We remove it completely for separate cleaning.
- Drain Pan: This tray catches condensation. If left dirty, it becomes a breeding ground for algae and bacteria.
- Side Panels: Removing these gives us better angles to clean the coil edges.
Pro Tip: Many budget cleaning services skip removing the blower wheel. Always ask your technician if they perform a “blower pull” as part of their deep clean. If they don’t, you are leaving about 50% of the dirt inside.
Step 4: Chemical Application (10-15 minutes)
We apply a professional-grade HVAC cleaning solution. In the US, we often use alkaline-based foaming cleaners (like Nu-Calgon’s Evap-Pow’r) rather than harsh acids, which can damage delicate aluminum fins.
Evaporator Coils
The chemical foam is sprayed directly onto the coils.
- Penetration: The foam expands to push dirt out from deep between the fins.
- Dwell Time: We let it sit for 5-10 minutes. This “dwell time” breaks down biofilm and grease.
- Safety: The solution is formulated to be metal-safe and biodegradable.
What’s in the chemical?
- Surfactants: To lift sticky grease and dust.
- Corrosion Inhibitors: To protect the metal of your AC unit.
- Anti-microbial agents: To eliminate mold spores and bacteria.
Step 5: High-Pressure Rinse (10 minutes)
Once the chemical has done its work, we rinse it away.
- The Tool: We use a specialized low-pressure washer, such as the CoilJet, which operates at roughly 125 PSI.
- The Technique: We spray directly into the coils, not at an angle, to avoid bending the sensitive aluminum fins.
- The Result: The water washes the dissolved grime into the bib kit and drains safely into a bucket.
You will likely see black, sludge-like water draining out. This is the accumulated biological growth that you have been breathing. We rinse until the water runs clear.
Step 6: Component Cleaning (15-20 minutes)
While the indoor unit dries, we take the removed parts outside or to a utility sink for scrubbing.
| Component | Cleaning Action | Why It Matters |
|---|---|---|
| Blower Wheel | Pressure washed and brushed | A clean wheel spins faster and quieter, moving more air. |
| Drain Pan | Scrubbed and treated with pan tablets | Prevents water leaks and eliminates the “dirty sock” smell. |
| Filters | Washed and sanitized | Restores unrestricted airflow to the system. |
| Plastic Housing | Wiped down with microfiber | Removes surface dust and restores the unit’s appearance. |
Step 7: Drainage Flush (5 minutes)
A clogged drain line is the number one cause of water leaking down your wall.
- Vacuum: We use a wet/dry vac to pull any slime out of the drain line from the outside.
- Flush: We pour water through the top to verify it flows freely.
- Treatment: We may add a drain tab to inhibit future algae growth.
Step 8: Reassembly (10-15 minutes)
We carefully put the puzzle back together.
- Alignment: The blower wheel must be perfectly centered to avoid vibration or noise.
- Connections: We reconnect the display wiring and sensor probes.
- Fit: We ensure the plastic casing snaps back into place without gaps.
Step 9: Refrigerant Check (5-10 minutes)
In the US, refrigerant acts as the “blood” of your AC system. It is a closed loop, meaning you should never “use up” gas.
- Gauges: We connect manifold gauges to the outdoor condenser.
- Measurement: We check subcooling and superheat levels to ensure the system is charged correctly.
- EPA Regulation: If the levels are low, it indicates a leak. Under EPA Section 608, a certified technician must identify the leak source before adding more refrigerant.
Note: Unlike some regions where “topping up” is casual, adding refrigerant to a leaking system in the US is often restricted and expensive. We focus on leak detection first.
Step 10: Final Testing (5-10 minutes)
We never leave until we confirm success.
- Power On: We re-engage the circuit breaker.
- Performance Test: We run the unit in “Cool” mode for 15 minutes.
- Temperature Check: We measure the output air. It should be significantly colder (usually 15-20°F cooler than the room air).
- Leak Check: We watch the unit to ensure no water drips from the casing.
Total Time: 1-2 Hours
| Step | Estimated Time |
|---|---|
| Assessment & Prep | 10 min |
| Dismantling | 15 min |
| Chemical Treatment | 15 min |
| Rinsing | 10 min |
| Component Cleaning | 20 min |
| Reassembly | 15 min |
| Refrigerant Check | 10 min |
| Final Testing | 10 min |
| Total Duration | ~105 min |
What You’ll See After
The difference is often immediate and dramatic.
- Visuals: The coil fins will shine like silver rather than looking gray and fuzzy.
- Sound: The unit will run quieter as the fan no longer struggles against drag.
- Airflow: You will feel a stronger breeze reaching the far side of the room.
- Smell: The air will smell fresh and neutral, free from that damp, moldy odor.
Safety & Care
A professional chemical wash is safe for your home when done correctly.
- Chemical Safety: We use non-fuming, biodegradable chemicals that are safe for indoor use.
- Property Protection: We treat your home with respect, leaving the work area cleaner than we found it.
- Equipment Care: We use tools designed specifically for mini-splits to prevent damage to delicate fins or electronics.
Ready for Your Chemical Wash?
Now you understand the precision involved in a proper AC deep clean. It is not just a quick spray; it is a restoration of your system’s performance.
Book your chemical wash today and breathe cleaner, cooler air this season!
Related Service: Learn more about our professional chemical wash service including pricing and what’s included.
Need This Service?
Ready to put these tips into action? Our professional technicians are here to help.
Learn More About Our Service